

Simple as that. I got the recipe from https://www.thecountrycook.net/homemade-ranch-seasoning/
Check them out.
Simple as that. I got the recipe from https://www.thecountrycook.net/homemade-ranch-seasoning/
Check them out.

Start your year off right. Set goals for yourself. I know that I am. I struggle being a mommy to 5 and not taking care of myself. If I don’t schedule time, it will not happen. Here is a chart I made to help me achieve my goal this year. I purchased the stickers from amazon. They have tons.

original link: http://www.dwellinginhappiness.com/chemical-free-liquid-laundry-detergent/
*This post contains affiliate links. To read my full disclosure policy, click here*
I like doing laundry. I mean, isn’t it fun to throw in dirty clothes, add a little soap, and then see how clean and good smelling they come out? It’s actually kind of satisfying! Now, I didn’t say I like the folding and putting away part, I just like the “doing” part. Who’s with me?
While I love the smell of my fresh clean clothes, I really dislike knowing that a ton of harsh and “icky” chemicals went into cleaning them. Don’t believe me? Visit the Environmental Working Group’s site and check it out. I dare you to type in your favorite laundry detergent that you’re using right now and see the grade it gets. My favorite that I used to use a few years ago received a big fat F. Yikes! I was shocked when I started typing in other known brands and seeing more and more “F’s.” No good, folks! There are known chemicals in store bought laundry detergent that have developmental and reproductive effects, cause respiratory problems, skin irritations, and allergies. To name just a few!
First, I’ll share with you how to make this chemical-free liquid laundry detergent. Then I’ll go into more detail about each ingredient and what it does.
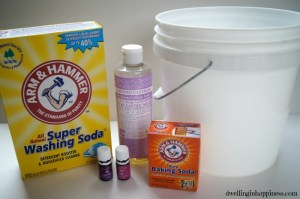
Supplies:
STEP 1
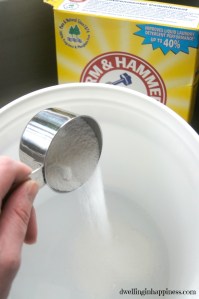
First, measure out 1/2 cup of the Super Washing Soda and pour into a 2 gallon bucket. I use this bucket for making this detergent only; I store my supplies in it and just grab it when I need to make more! That way it stays nice and clean and doesn’t get used and dirty with other things.
STEP 2

Add just enough hot tap water to cover the washing soda, and stir well to dissolve.
STEP 3
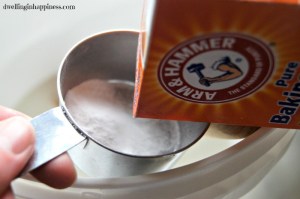
Measure out and pour 1/2 cup of Baking Soda into the water/washing soda mixture, and stir well to dissolve.
STEP 4
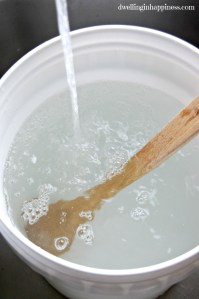
Fill up your bucket all the way to the top with hot tap water, only leaving about 1/2 inch of room on top. Make sure you do this BEFORE adding in your castile soap, or you’ll have a bubbly mess!
STEP 5

Measure and pour into the bucket 3/4 cup of castile soap. My favorite is Dr. Bronner’s, and they have a few different scents. I used lavender because I love how fresh it smells. But, you can also buy unscented and use your favorite essential oils to give it a yummy fresh smell!
STEP 6

Pour in 30 drops of your favorite essential oils! I used 20 drops of lavender, and 10 drops of “joy.” They smell SO good.
STEP 7

Carefully stir everything together until well mixed.
STEP 8
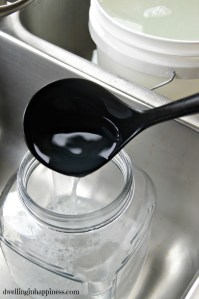
Pour the detergent into jars or bottles. I used a soup ladle to transfer into my big jars, but if your bottle is thinner you can use a funnel.
TO USE:
Pour 1/3 cup of the detergent in with your dirty clothes and wash as normal. Contents might settle to bottom or clump, but just give the bottle a good shake before you use it every time and it’ll be fine. The clumps will break up in the wash. I noticed mine gets clumpier when it’s cold, so I try to keep it in a warmer spot, like under my kitchen sink during the winter.

This is one of my most favorite projects I think i have ever done. We have a beautiful house that we built this past year with a wonderful company. I have gone through the house in my head room by room to create custom things and this is one of my first projects I decided to do. So my husband went out of the country and I always come up with some project to keep me busy. This project turned out so good

I started out by going to Home depot and got this wood. (15/32 inch plywood). I had the home depot guy cut it down to 6 inch planks. My ceiling is 18 feet tall and I used about 5 sheets.
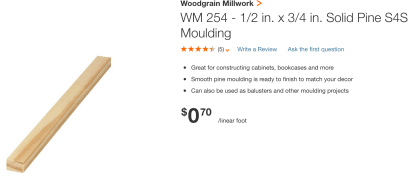
Below is the trim I got to finish out the edges.
Next, is pretty simple. I measure how long to wood should be and cut all the pieces going up.


Once all that was cut I got my nail gun and nailed them up. The important thing to shiplap is the SPACE in between the boards. I used NICKLES to be my spacers. It was pretty simple.
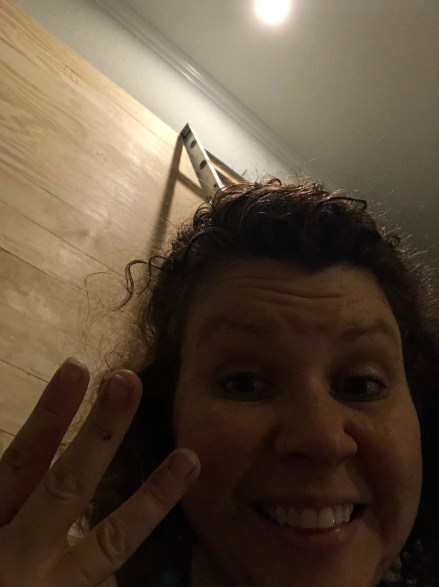
Yes I was determine to finish this project in 1 night. My kids were all in bed and homework was done. I had 3 more boards left and man was this high.
Lesson I learned is paint the boards ahead of time before hanging them this high. So glad I did that. Made it alot easier so i didn’t have to get so high to cut in.

Once I finished the boards It was time to trim and paint. I tested the paint to how I liked it. On all the edges I just nailed the trim to frame out the shiplap. Most shiplap is done in white but I wanted something dramatic going up my fireplace. I used Olymipa “Knights Armor” flat paint. I love this color.

I really loved how it turned out. I ended up painting my picture to contrast the white stone fireplace and just kinda got stuff I had around the house to display everything. The tobacco basket and wreath at the top came from Hobby Lobby. I custom made the farmhouse sign and everything else I have had for a long time.
For questions or more information email me at tiffany@tiffanystrong.com
